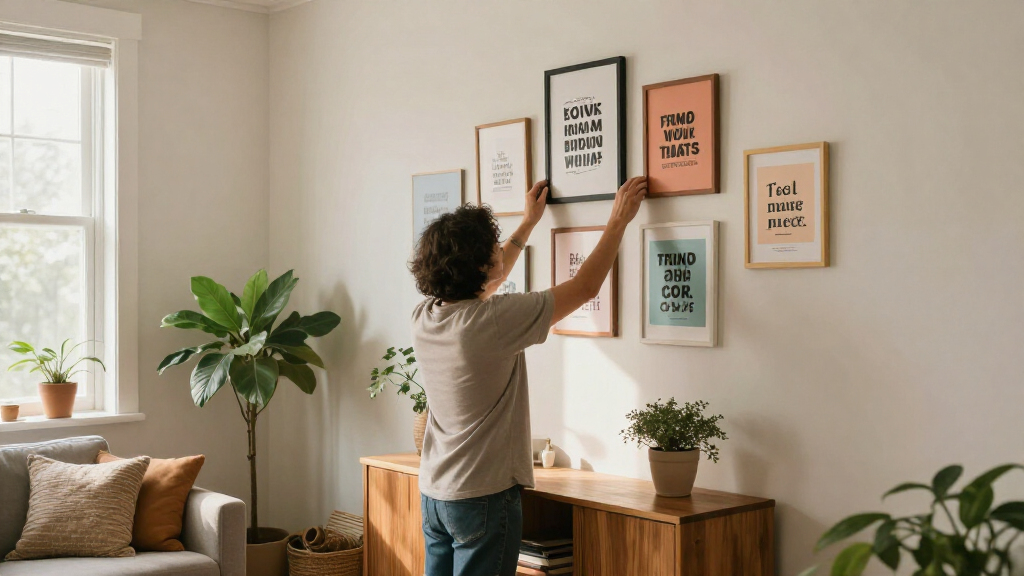
Create a motivational quote print that fits your space, reads clearly from across the room, and hangs securely. This guide is for beginners making one piece of wall art with a computer or by hand. Allow about 1–2 hours for choosing the quote, designing the layout, and preparing the display; printing or paint drying can add time.

Get the little things that make your day delivered free with Prime
- Fast, free delivery on millions of items
- Prime Video, Amazon Music and more included
- Member-only deals all year

Outus 9 Inspirational Wall Art Prints for Classroom Office, 8×10, Unframed
- ✔ Print count: 9
- ✔ Print size: 8 x 10 inches
- ✔ Material: Laminated cardstock

The Man in the Arena Motivational Wall Art
- ✔ Artwork: The Man in the Arena quote
- ✔ Dimensions: 15.75 x 11.81 x 0.98 inches
- ✔ Materials: Canvas, plastic, and wood

Motivational Inspirational Office Wall Art Print Set of 4
- ✔ Print count: 4
- ✔ Print size: 8 x 10 inches
- ✔ Material: Paper
Difficulty: Beginner | Time: 1–2 hours, plus printing and drying time
What You’ll Need
Tools & Materials:
- Computer with a basic design or word-processing app, or paper and drawing tools
- Printer or access to a print shop if making a digital design
- Paper or lightweight cardstock suited to your printer
- Ruler, pencil, and scissors or paper trimmer
- Frame, mounting strips, or other wall-safe hanging hardware
- Level and tape measure
Knowledge:
- Basic computer or handwriting skills
- Ability to measure a wall and use the chosen hanging hardware
Choose a frame or print size before laying out the design. Check the printer’s supported paper sizes and the wall surface before buying mounting hardware. If the quote is by someone else, verify the wording and attribution from a reliable source.
Outus 9 Inspirational Wall Art Prints for Classroom Office, 8×10, Unframed
For a wall that should offer more than one daily prompt, Outus is our most versatile pick. Its nine 8-by-10-inch prints give buyers room to spread messages across a classroom, office, or study area, or to choose a smaller coordinated selection. That range is the main reason it ranks above DSHFG, whose four-print set creates a simpler, more uniform display.The laminated cardstock and included 40 adhesive dots make this the easiest set here to put up without first finding frames. The glossy watercolor-style treatment adds visual texture compared with DSHFG’s minimalist black-and-white typography. Still, these are unframed prints, and the black-focused palette may not suit rooms built around warmer or more colorful décor. We would choose Outus for a flexible message wall; buyers seeking a polished, framed focal point should look instead to the Man in the Arena canvas.
Pros:
- Nine prints provide more quote and arrangement variety than the other sets.
- Laminated cardstock is more substantial than ordinary paper prints.
- Includes 40 adhesive dots for tool-free mounting.
- Standard 8-by-10-inch format can be placed in compatible frames.
Cons:
- Unframed prints may need separate frames for a more finished look.
- Black-focused artwork may feel limited in colorful interiors.
- Landscape orientation should be checked against the intended wall layout.
Best for: People furnishing a classroom, shared office, or study space who want several motivational messages and quick mounting.
Not ideal for: Buyers who want framed artwork, a colorful palette, or a single large statement piece.
Bottom line: We recommend Outus for buyers who want the widest choice of motivational messages and a low-effort way to arrange them.
“We recommend Outus for buyers who want the widest choice of motivational messages and a low-effort way to arrange them.”
The Man in the Arena Motivational Wall Art
When we want motivational art to read as one considered focal point, The Man in the Arena is the clearest fit. Its framed canvas presents Theodore Roosevelt’s well-known passage as a single statement, rather than scattering attention across a set of shorter prompts. That makes it a more finished display than either Outus or DSHFG, both of which arrive unframed.The approximately 15.75-by-11.81-inch canvas includes a slim black plastic and wood frame and is described as ready to hang or place on a desk. Its fade-resistant ink is intended to preserve the printed image, while the lightweight build helps with placement. The tradeoff is limited choice: there is one quote and one listed size, so it cannot match Outus for variety or DSHFG for a coordinated set of separate prints. We would pick it for a personal office or study where this specific message matters; skip it if you want multiple quotes or a larger wall-filling arrangement.
Pros:
- Framed canvas offers a more complete presentation than the unframed sets.
- Features the specific Man in the Arena quotation as a clear focal point.
- Can be hung on a wall or displayed on a desk.
- Lightweight construction supports flexible placement.
Cons:
- Only one quote is included, limiting message variety.
- The single listed size may not suit every wall.
- Black-and-white artwork may not fit all décor palettes.
Best for: Buyers who want one substantial, framed motivational quotation ready for an office, bedroom, classroom, or desk.
Not ideal for: People who want several different quotes, alternative sizes, or a colorful design.
Bottom line: Choose this framed canvas when one recognizable motivational passage and a ready-to-display format matter more than variety.
“Choose this framed canvas when one recognizable motivational passage and a ready-to-display format matter more than variety.”
Motivational Inspirational Office Wall Art Print Set of 4
DSHFG’s four-print set is the restrained choice for buyers who want motivational wording without watercolor effects or a framed centerpiece. The bold black-and-white typography is described as a modern minimalist design, making it an easy visual match for a monochrome office, dorm, or study nook. Compared with Outus, it offers fewer prints and no included adhesive dots, but the smaller set may feel more cohesive and easier to place in a compact workspace.Each print measures 8 by 10 inches and uses lightweight paper. That keeps the pieces simple to handle, but paper is the more delicate option in this lineup: framing or other protection may be helpful, especially in a busy room. Unlike the Man in the Arena canvas, DSHFG does not arrive as a finished framed display, and its four separate prints do not create the same single focal point. Choose it when coordinated typography matters more than material protection or immediate readiness to hang.
Pros:
- Four prints create a coordinated motivational display.
- Minimalist black-and-white typography suits contemporary interiors.
- Lightweight prints are easy to handle and arrange.
- Useful across offices, study rooms, dorms, and classrooms.
Cons:
- Paper can be fragile and may benefit from framing.
- The 8-by-10-inch format may feel small on a large wall.
- Frames and mounting supplies are not specified as included.
Best for: People styling a compact, contemporary workspace who prefer several coordinated monochrome quote prints.
Not ideal for: Buyers who need durable laminated prints, included mounting supplies, or a framed piece ready to display.
Bottom line: DSHFG is a sensible minimalist pick when a small coordinated set matters more than the added durability and setup convenience of Outus.
“DSHFG is a sensible minimalist pick when a small coordinated set matters more than the added durability and setup convenience of Outus.”
As an Amazon Associate we earn from qualifying purchases.
Before You Start
Pick a spot away from regular splashes, steam, and direct sunlight so the print is less likely to fade or warp. Measure the available space and note nearby furniture, switches, and other wall decor. If you rent or have delicate paint, check the hanging product’s instructions and test an inconspicuous area when appropriate.
Step-by-Step Instructions
Step 1: Choose a short quote
Write down a few phrases that suit the room and the people who use it. Select one that can be read in a few seconds; a short sentence or phrase is easier to display at a useful size than a long passage. Check spelling, punctuation, and the exact wording. If you include an author’s name, confirm the attribution before adding it.
Tip: Avoid using a quotation if you cannot verify its wording or source. You can use an original phrase instead.
Check: The final wording is accurate, concise, and appropriate for the display location.
Step 2: Set the print size and layout
Choose the frame or paper size, then set the same dimensions in your design app. For a simple layout, center the quote and leave generous margins. Break a long phrase at natural pauses so each line is easy to read. Keep the author credit smaller than the quote and place it close enough to show the connection.
Tip: Use a plain background and limit decorative elements so they do not compete with the words.
Check: The design fits within the page, with clear margins and no text near the trim edge.
Step 3: Choose readable type and color
Select a legible font and make the quote large enough to read from the distance where people will usually see it. Use strong contrast, such as dark lettering on a light background. Limit the design to one or two type styles. If creating the art by hand, lightly mark guide lines with a ruler before lettering so the lines stay aligned.
Tip: Very thin lettering, all-caps scripts, and low-contrast colors can be hard to read, especially from across a room.
Check: View the design at its intended physical size or print a small test; the wording remains easy to read.
Step 4: Review the design before printing
Read the quote aloud while checking every word and punctuation mark. Confirm that the author credit is correct and that no letters are clipped. Check that the page dimensions match the paper or frame opening. Save a copy of the final design before printing.
Tip: A preview at high zoom can hide spacing problems. Check the whole page at once, then inspect the text closely.
Check: The preview shows the full design, correct wording, and balanced spacing.
Step 5: Print or finish the artwork
Load the correct paper and select the matching size and orientation in the print settings. Use a quality setting suited to text and graphics, then print one copy. Let ink dry fully before handling. For hand-lettered art, erase visible pencil guides only after the ink or paint has dried.
Tip: Do not force paper that is too thick for the printer. Check its manual or use a print shop if the stock is unsupported.
Check: The print is sharp, fully visible, and free of smudges, streaks, or cut-off text.
Step 6: Trim and frame the print
Measure the frame opening and compare it with the print. Trim the paper with a ruler and paper trimmer or scissors if needed, keeping the cut straight and the design centered. Place the print in the frame without bending it, then secure the backing. Clean the frame glass or front panel before hanging.
Tip: If the frame includes a mat, measure the visible opening rather than the full frame size.
Check: The print sits flat behind the frame front, with even edges and no trapped dust or visible creases.
Step 7: Position and hang the art
Hold the framed print at the chosen spot and check how it relates to nearby furniture and other wall decor. Mark the hanging point with a pencil. Use hardware rated for the frame’s weight and suitable for the wall material, following its instructions. Check alignment with a level, then hang the frame and confirm it is stable.
Tip: Before drilling, check for hidden wiring or pipes where relevant. For adhesive strips, follow the surface preparation and waiting instructions on the package.
Check: The frame hangs level, stays in place, and can be read from the usual viewing position.
Common Mistakes to Avoid
- Hanging the frame with hardware that does not suit its weight or the wall surface. — Check the frame weight and wall type, then follow the hardware rating and installation directions.
Troubleshooting
Problem: The printed text looks blurry or pixelated.
Solution: Use a higher-resolution source file, avoid enlarging a small image, and print using a suitable quality setting. Recheck the result before framing.
Problem: The print is cropped or does not fit the frame.
Solution: Confirm the page size and orientation, then compare the print with the frame opening. Reprint at the correct dimensions or trim carefully while keeping the design centered.
Problem: Ink smears when the print is handled.
Solution: Set the print aside until fully dry. Check that the paper type matches the printer setting and try a compatible paper if smearing continues.
Problem: The frame tilts or shifts after hanging.
Solution: Take it down and check that the hanger is centered and the hardware is rated for the frame and wall. Reinstall with suitable hardware, then level the frame again.
What Success Looks Like
The finished wall art displays the quote exactly as intended, with clear lettering, balanced spacing, and a clean frame or edge. From the usual viewing position, the words are easy to read. The artwork hangs level and stays securely in place.
Next Steps
Keep a digital copy of the design in case you want to reprint it. Dust the frame with a soft cloth and check the hanging point periodically. If you move the art, inspect the new wall surface and choose hardware that suits it before rehanging.
Frequently Asked Questions
What size should motivational quote wall art be?
Choose a size that fits the wall and can be read from the normal viewing distance. Measure the available space first, then make the quote large enough to remain legible within that format.
Can I make the artwork without a computer?
Yes. Use a ruler to mark light guide lines, letter the quote with a pen or paint marker, and let it dry before erasing the guides. Frame the finished sheet or mount it on a backing board.
What paper works best for a printed quote?
Use paper supported by your printer. A heavier matte paper can feel more substantial, but check the printer’s limits before loading cardstock or specialty stock.
How do I hang the art without damaging the wall?
Use removable hanging strips rated for the frame’s weight and suitable for the wall finish. Follow the package directions for cleaning the surface, applying the strips, and waiting before hanging.