Vinyl cutting involves transforming digital designs into precise decals by selecting the right vinyl and tools, then preparing your cutter with correct settings. To guarantee a smooth process, choose simple, clear fonts, and avoid overly intricate artwork. Properly set up your cutter, adjust blade depth, and align your material to prevent issues. As you learn to cut and weed carefully, you’ll achieve professional results. Keep going, and you’ll discover all the tips needed for perfect vinyl projects.
Key Takeaways
- Choose appropriate vinyl types and tools, ensuring compatibility and quality for clean cuts and easy weeding.
- Design simple, high-contrast artwork with clear fonts to facilitate precise cutting and straightforward weeding.
- Properly set up and calibrate the vinyl cutter by adjusting blade depth, pressure, and alignment for optimal performance.
- Use correct cutting techniques, including appropriate blade pressure and speed, to prevent tearing and ensure accurate cuts.
- Thoroughly clean and prepare surfaces before application, then carefully weed excess vinyl for a professional and durable finish.

10 Things That Require Zero Talent -Motivational Wall Decor, 8x10 Inches Unframed Office Wall Art Print, Inspirational Leadership Quote Poster for Work, Gym, Classroom and Team Building
SIZE AND MATERIAL: This 8x10 inch unframed wall art print is produced on professional Fuji Photopaper with a...
As an affiliate, we earn on qualifying purchases.
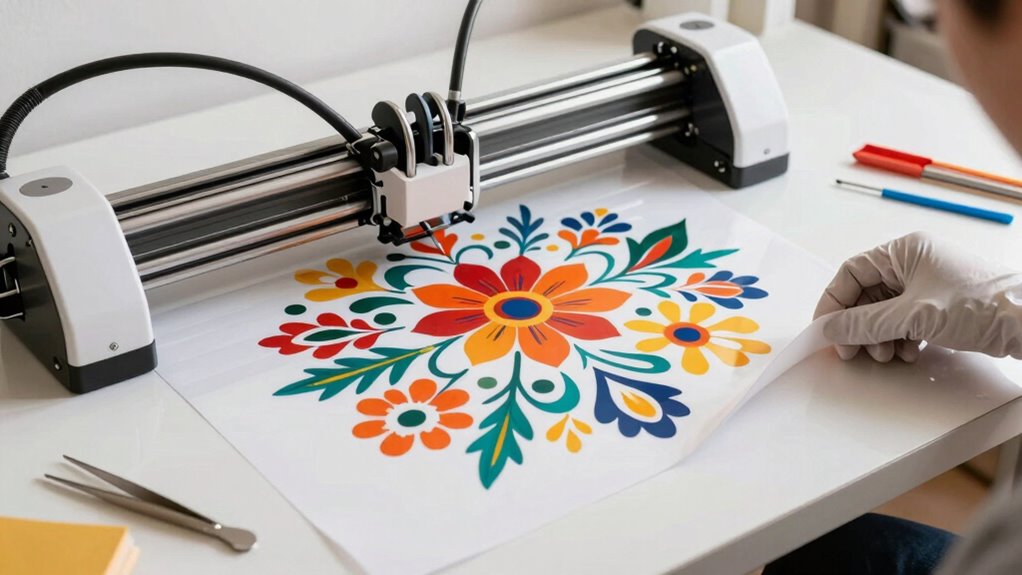
What Is Vinyl Cutting and How Does It Work?
Have you ever wondered how intricate designs are made for decals or custom signs? Vinyl cutting involves using specialized cutting machines to transform digital designs into physical patterns. These machines work with various material types, including adhesive vinyl, heat transfer vinyl, and specialty films, each suited for different projects. The process starts with creating or importing a design into software that directs the cutter. The machine then precisely cuts along the design lines, following your specifications. Once cut, you’ll weed away the excess material, leaving only your design behind. Understanding machine operation helps you appreciate the precision and craftsmanship involved in every project. Vinyl cutting is a versatile, efficient way to produce detailed, professional-looking decals, signs, and custom graphics.

Outus 9 Pieces Inspirational Phrases Posters Office Classroom Wall Decor Motivational Sayings Quote Positive Affirmations Wall Art Decorations for Teens Adults Living Room,Unframed,8 x 10 Inch (Black)
Complete combination set: this package contains 9 pieces of inspirational quote wall art prints and 40 pieces adhesive...
As an affiliate, we earn on qualifying purchases.
How to Choose the Right Vinyl and Tools for Your Projects
Choosing the right vinyl and tools is vital to achieving professional results and guaranteeing your project’s success. With so many vinyl types available, selecting the best one depends on your project’s purpose, durability needs, and surface. For example, adhesive vinyl works well for decals, while heat transfer vinyl is perfect for fabrics. Additionally, choosing the right cutting tools is essential; sharp blades and compatible mats make a significant difference. Considering the color accuracy of your vinyl can also impact the visual appeal of your design, especially for projects that require precise color matching. Properly matching the vinyl type to your project’s surface and longevity requirements ensures a more durable and attractive finish. The material compatibility of your vinyl and tools is also crucial to prevent issues during cutting and weeding. Here are three tips to help you decide:
Choosing the right vinyl and tools ensures professional results and project success.
- Match vinyl types to your project’s surface and longevity requirements.
- Use high-quality cutting tools to ensure clean cuts and avoid tearing.
- Consider your machine’s specifications when selecting blades and mats for peak results.

Supwhd Positive Affirmations Wall Decor, Inspirational Add Up to Big Results Office Wall Art, Motivational Quotes Wall Art for Office Classroom Home, 12x16
【Product Dimensions】12x16, comes with a non-detachable poster hanger frame.
As an affiliate, we earn on qualifying purchases.
Designing Your Vinyl Files: Tips for Clear, Cuttable Artwork
To create cuttable vinyl designs, start by selecting clear, simple fonts that are easy to read and cut accurately. Make sure your artwork is high-resolution to prevent blurry or jagged edges. Simplify complex designs to avoid intricate details that may not cut well on vinyl. Additionally, ensuring your design has sufficient contrast between elements can improve cutting precision and final appearance. Paying attention to design simplicity can also help ensure your vinyl cuts turn out clean and professional-looking. Considering free floating design elements can help keep your artwork balanced and visually appealing. Moreover, reviewing your design for visual clarity ensures the final product will be sharp and precise.
Choose Clear, Simple Fonts
Selecting fonts that are clear and simple is essential for achieving clean, professional-looking vinyl cuts. Your typography choices directly impact font readability and ease of cutting. To guarantee success, keep these tips in mind:
- Use sans-serif fonts like Arial or Helvetica for better clarity and smoother cuts.
- Avoid overly decorative or script fonts that can become unreadable or difficult to weed.
- Stick to bold or medium weights; thin fonts may tear or be hard to see during weeding.
- Ensuring proper font size and spacing can also significantly improve your results and ease of weeding.
Use High-Resolution Artwork
High-resolution artwork is key to guaranteeing your vinyl cuts come out sharp and professional. When your design has clear details and crisp lines, it’s easier to achieve precise cuts. Pay attention to color contrast; using distinct, contrasting colors helps differentiate elements, making your design more visually appealing and easier to cut accurately. Also, consider the ink types used in your artwork—high-quality, well-printed images prevent blurriness and pixelation. Avoid low-resolution images or blurry graphics, as they can lead to jagged edges and uneven cuts. By using high-resolution files, you guarantee your vinyl cutter can interpret the design accurately, resulting in clean, professional-looking results. Clear, detailed artwork saves you time during weeding and produces a more polished final product. Choosing appropriate printmaking paper textures can also inspire creative effects in your vinyl designs.
Simplify Complex Designs
Complex designs can be challenging to cut cleanly, so simplifying them guarantees better results. When working with layered designs, reducing unnecessary details helps your vinyl cutter handle each layer more efficiently. Focus on essential elements and avoid overly intricate patterns that can cause miscuts or tearing. Additionally, clear color matching between layers ensures smooth weeding and assembly. To simplify your designs effectively:
- Break complex images into fewer layers, keeping only crucial details.
- Use solid shapes instead of intricate patterns to improve cut accuracy.
- Match colors intentionally, so each layer is distinct and easy to weed.
- Understanding wall surface finishes can help you choose appropriate adhesives and transfer techniques to prevent damage during application.

Inspirational Wall Art Decor for Office, Wooden Rustic Hanging Motivational Wall Art Decoration Sign, Inspiring Positive Quotes Wall Art for Home Living Room Bedroom Bathroom Classroom Gym 12"x24"
INSPIRATIONAL QUOTES - This inspiring wall decoration has some inspirational quotes. When you feel tired at work or...
As an affiliate, we earn on qualifying purchases.
How to Set Up Your Vinyl Cutter for Accurate, Smooth Cuts
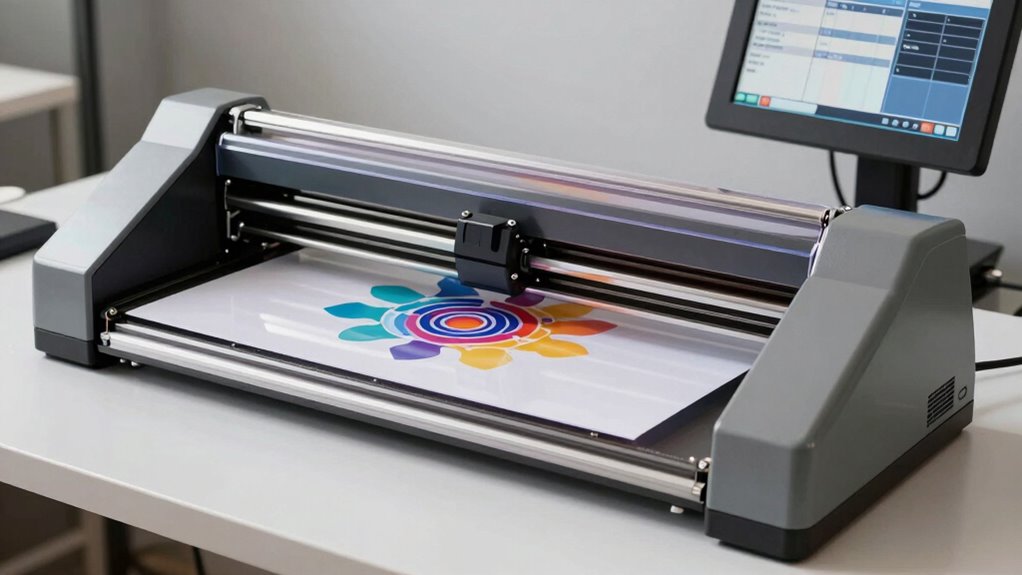
To get clean, precise cuts, you need to set up your vinyl cutter correctly. Start by adjusting the blade depth and calibrating the cutting force to match your material. Make sure your vinyl is properly aligned to avoid uneven or crooked cuts. Additionally, understanding the ethical considerations involved in customizing designs can help ensure your projects respect intellectual property rights and promote responsible crafting. Proper machine maintenance can also extend the lifespan of your cutter and maintain cutting accuracy over time. Regularly inspecting and cleaning the cutting blade will help prevent dullness and ensure consistent results. Incorporating proper setup practices can significantly improve your overall cutting performance and reduce material waste.
Adjust Blade Depth
Setting the blade depth correctly is vital for achieving clean, precise cuts on your vinyl. If the blade is too shallow, it won’t cut all the way through; too deep, and it risks damaging your material or dulling quickly. To get it right, follow these steps:
- Adjust the blade so that it just barely protrudes beyond the holder’s edge.
- Test cut on scrap vinyl, checking if the cut fully separates without tearing or excess resistance.
- Fine-tune the cutting depth by small increments, ensuring the blade is neither too deep nor too shallow.
Proper blade adjustment ensures smooth cuts and reduces material waste. Remember, setting the correct cutting depth is vital for precision and the longevity of your blade.
Calibrate Cutting Force
Calibrating the cutting force guarantees your vinyl cuts are clean and accurate without damaging the material. To do this, adjust your blade pressure so it applies just enough force to cut through without tearing or dragging. Start with a low setting, then gradually increase until you see a clean cut. Visualize the blade pressing evenly against the vinyl, like a steady hand guiding a paintbrush. Ensuring proper calibration of your cutter is essential for consistent results and blade longevity. Regularly checking your cutting force helps maintain optimal performance and prolongs the life of your blade. Proper machine setup is crucial to achieve precise cuts and reduce material waste. Additionally, understanding the pressure adjustment process can help prevent unnecessary wear on your equipment and improve overall cutting quality. Keeping your tools well-maintained ensures the best possible results and extends the lifespan of your vinyl cutter.
Use Proper Material Alignment
Ensuring your vinyl material is properly aligned on the cutting mat is essential for accurate and smooth cuts. Proper material alignment prevents uneven cuts and enhances adhesive positioning, making weeded designs cleaner. To achieve this, follow these steps:
- Align the vinyl edges with the grid or guides on your cutting mat, ensuring the material is straight and centered.
- Secure the vinyl firmly to prevent shifting during cutting, maintaining consistent adhesive positioning.
- Double-check the alignment before starting the cut, verifying that the design is positioned correctly relative to the cut lines and margins.
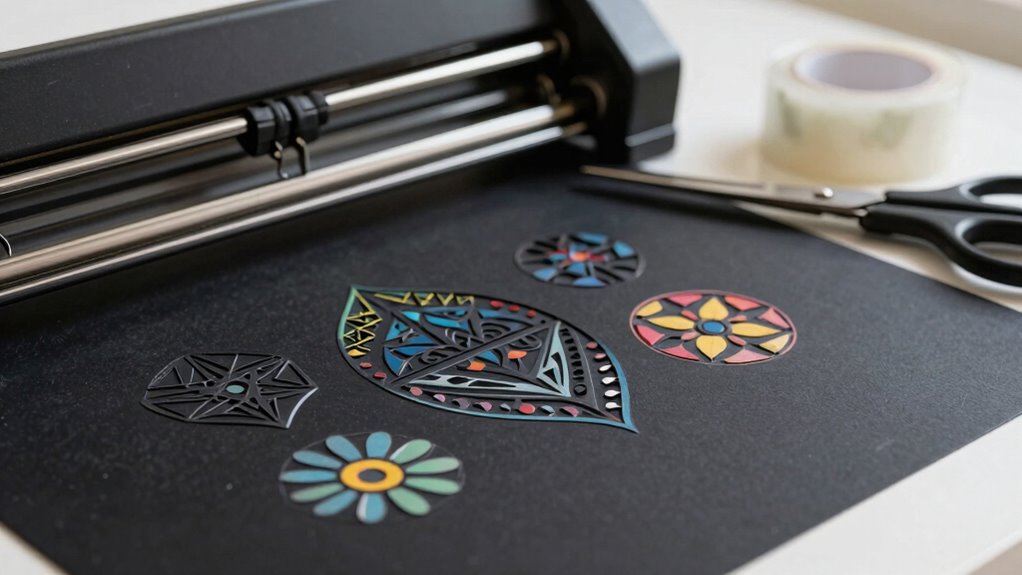
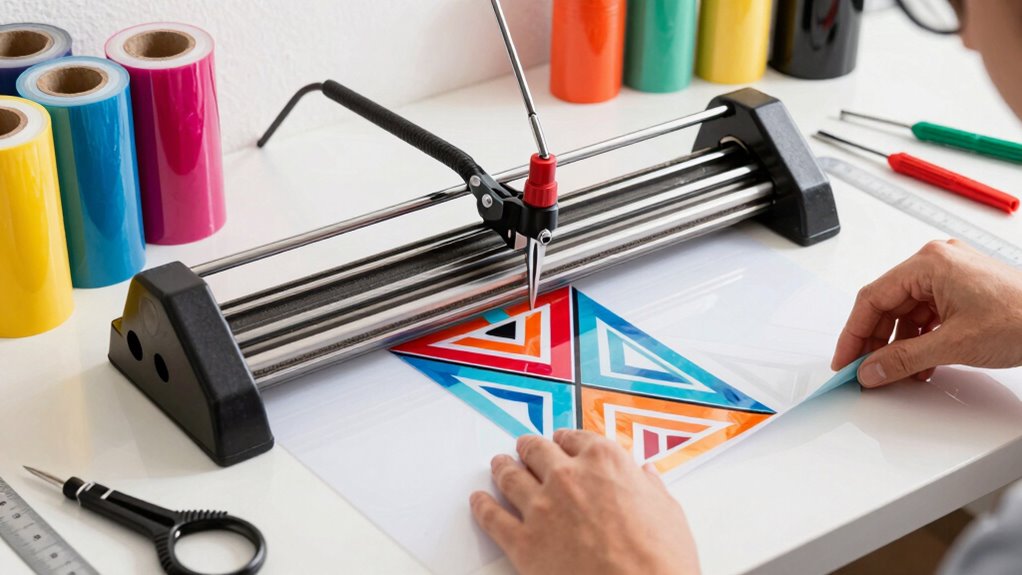
How to Cut and Weed Vinyl Designs: A Step-by-Step Guide
Cutting and weeding vinyl designs might seem simple, but it’s essential to follow the right steps to get a clean, professional finish. First, make sure your material has proper adhesion to your cutting mat, preventing slipping during the cut. When selecting vinyl, consider your design’s color; contrasting colors make weeding easier, especially for intricate details. Set your machine’s blade depth and speed according to the vinyl thickness, avoiding cuts that are too shallow or deep. After cutting, carefully peel away the excess vinyl, starting from a corner. Use a weeding tool to gently lift small pieces, ensuring the design stays intact. Proper material adhesion and thoughtful color selection are key to smooth cutting and easy weeding. Additionally, understanding the importance of proper material adhesion can significantly improve your results and reduce frustration during the weeding process. Paying attention to cutting machine calibration can also help achieve more precise cuts and reduce errors. Ensuring your workspace has good air quality can help maintain optimal conditions for your equipment and materials, leading to better results and a safer crafting environment.
Troubleshooting Common Vinyl Cutting and Weeding Problems
When you encounter issues during vinyl cutting or weeding, it’s often due to incorrect machine settings or material problems. For example, if your cut doesn’t align or tears easily, check your blade depth and pressure. Using color vinyl with a matte finish can sometimes cause the blade to perform differently; verify your blade is sharp and compatible.
Check blade depth and material compatibility to prevent tearing and misalignment during vinyl cutting and weeding.
Here are some common fixes:
- Adjust your blade depth and cutting speed for smoother cuts on matte finish vinyl.
- Double-check that your settings match the thickness of your vinyl to prevent tearing during weeding.
- Use a test cut to verify your machine’s calibration before starting your project.
These steps will help resolve most cutting and weeding problems efficiently.
Applying Your Vinyl Decals for a Professional Finish
To achieve a professional finish when applying your vinyl decals, it’s essential to prepare the surface properly and use the right techniques. Start by cleaning the area thoroughly to remove dust and grease. Use application techniques like a squeegee or credit card to smooth out the decal, ensuring no air bubbles or wrinkles. For finishing touches, gently press along the edges to secure adhesion. Visualize the process with this imagery:
| Surface Type | Application Technique | Result |
|---|---|---|
| Glass | Smooth, even pressure | Clear, bubble-free decal |
| Wood | Firm, consistent pressure | Secure, durable finish |
| Painted walls | Light, controlled pressure | Flawless look |
| Metal | Steady, firm strokes | Sharp, professional edge |
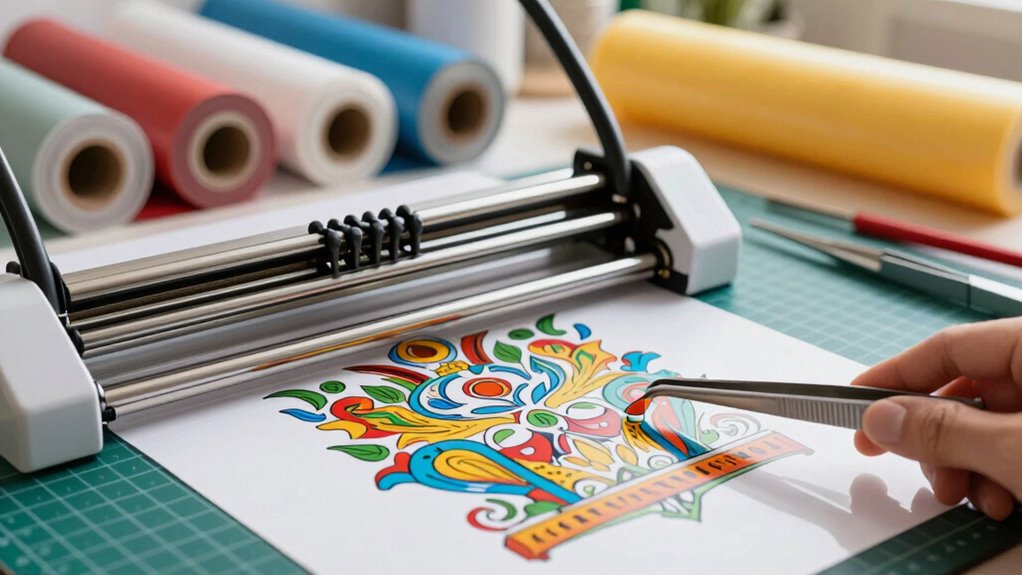
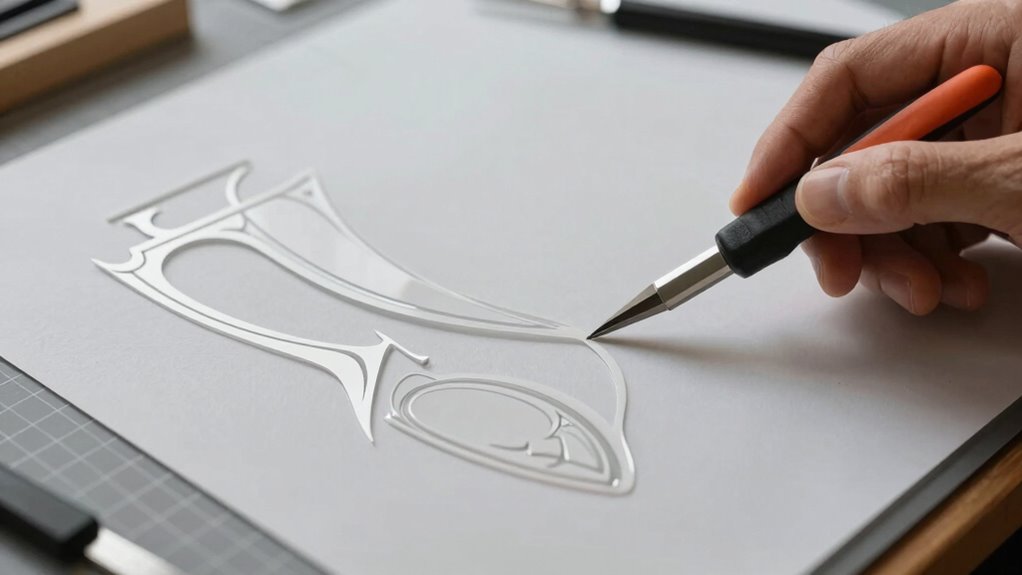
Mastering Weeding: Tips for Clean, Precise Edges
Mastering weeding is key to achieving clean, precise edges that make your vinyl projects look polished. To do this effectively, focus on color contrast—use a backing or transfer tape that highlights the cut lines, making weeds easier to see. Invest in quality weeding tools, like fine-tipped tweezers or craft picks, to navigate intricate designs without damaging the vinyl. Keep your workspace well-lit so you can spot any leftover bits.
Here are three tips to improve your weeding skills:
- Use high-contrast colors to easily distinguish cut lines from unwanted vinyl.
- Select the right weeding tools for detailed, delicate areas.
- Take your time, especially around intricate parts, to ensure edges stay crisp and clean.
Frequently Asked Questions
Can I Reuse Vinyl Scraps for Future Projects?
Yes, you can reuse vinyl scraps for future projects. To do so, practice good scrap recycling by storing your vinyl properly. Use airtight containers or peel-and-stick sheets to keep scraps clean and organized. Label your vinyl storage tips to easily find the right color and size later. Reusing scraps not only saves money but also minimizes waste, making your crafting more sustainable and efficient.
What Safety Precautions Should I Take During Vinyl Cutting?
Did you know that improper safety precautions can lead to health issues? You should always wear safety equipment like gloves and eye protection when vinyl cutting. Make sure your workspace has good ventilation to avoid inhaling fumes. Keep your area clean and organized to prevent accidents. By following these precautions, you protect yourself and create a safer environment for your creative projects. Safety should always come first in your vinyl cutting process.
How Do I Store Unused Vinyl to Prevent Damage?
To prevent damage, store your unused vinyl properly by following these storage tips for vinyl preservation. Keep it in a cool, dry place away from direct sunlight, which can cause warping or fading. Store rolls horizontally on shelves or vertically in a upright position, ensuring they’re not stacked too tightly to avoid creases. Use protective covers or bags to shield your vinyl from dust and dirt, maintaining its quality for future projects.
Are There Eco-Friendly Vinyl Options Available?
Yes, you can find eco-friendly options for vinyl that use sustainable materials. These environmentally conscious choices help reduce your carbon footprint while still delivering durable, high-quality results. Look for brands that emphasize eco-friendly options, such as biodegradable or recyclable vinyl. By choosing sustainable materials, you support a greener planet and create projects that are both beautiful and environmentally responsible. It’s a win-win for your craft and the Earth!
How Can I Personalize or Customize My Vinyl Designs Further?
You can personalize or customize your vinyl designs further by exploring various design customization techniques. Try adding your own artwork, text, or patterns, and experiment with different fonts and colors to make your design unique. Incorporate layering or combining multiple vinyl colors for depth. Using software with advanced features allows you to fine-tune your design details, ensuring your project reflects your personal style through effective personalization techniques.
Conclusion
Now that you’ve mastered vinyl cutting, your designs will come to life like a work of art blooming from a seed. With patience and practice, you’ll navigate each step smoothly, turning blank surfaces into eye-catching masterpieces. Remember, every cut and weed brings you closer to perfection—think of it as sculpting your own success. Keep experimenting, stay attentive, and soon, your vinyl projects will shine brighter than a freshly polished gem.