

Your green screen background looks bad mainly because of lighting mistakes, material issues, or setup flaws. Shadows, hotspots, or color spill can ruin the keying effect, making your footage look unprofessional. Rushing your setup or neglecting proper lighting and material choices often causes these problems. Paying attention to even lighting, using the right fabric, and ensuring correct camera settings can drastically improve your results. Keep exploring these tips to transform your green screen work into something polished.
Key Takeaways
- Using wrinkled or reflective green screen materials causes shadows and color spill, ruining keying quality.
- Uneven or poor lighting creates shadows, hotspots, and color inconsistencies, making backgrounds look unprofessional.
- Improper camera calibration and exposure settings lead to inaccurate colors and difficult keying results.
- Inadequate post-production adjustments, like poor color correction and edge refinement, reveal the background flaws.
- Lack of proper setup, including slack green screens and inconsistent camera settings, results in uneven backgrounds and poor compositing.

HEMMOTOP Green Screen Backdrop, 5×7 ft Photography Chroma Key Greenscreen Background Sheet for Background Removal, Zoom Meeting, Photo Video Studio, Live Streaming, Video Recording (Backdrop only)
Great Quality &Less Wrinkles: HEMMOTOP 5×7 ft green screen backdrop made of polyester material, pure green color, the…
As an affiliate, we earn on qualifying purchases.
As an affiliate, we earn on qualifying purchases.
How to Choose and Set Up Your Green Screen Material

Choosing the right green screen material is crucial for achieving clean, professional-looking backgrounds. Your material choice directly impacts how easily you can remove the background and how realistic the final composite appears. Look for a smooth, non-reflective fabric like matte muslin or nylon, which minimizes light bounce and shadows. When setting up, use proper setup techniques: ensure the material is taut and wrinkle-free to prevent shadows and uneven coloring. Secure it tightly to avoid sagging, and keep it evenly lit to maintain a consistent chroma key. Avoid glossy or shiny surfaces that reflect light and cause spill. Additionally, selecting materials that are less prone to wrinkling or sagging can help maintain a smooth appearance over time. Choosing proper setup techniques also helps in reducing post-production editing time and effort. Proper lighting and material maintenance are essential for long-term results. With the right material choice and a careful setup, you’ll create a seamless backdrop that makes your green screen effect flawless.

RALENO Photography Lighting Kit, 8.5x10ft Photo Backdrops Stands with 6x9ft Green Screen, 50W LED Bulbs, 5500 K, 97CRI, Umbrellas&Softbox Lighting kit for Studio Portrait Product Photography
COMPLETE PHOTOSTUDIO SET: Whether you are a beginner, amateur photographer or professional, the RALENO lighting set fulfills your…
As an affiliate, we earn on qualifying purchases.
As an affiliate, we earn on qualifying purchases.
Lighting Tips to Achieve a Seamless Green Screen Background

To get a clean green screen, you need to focus on proper light placement to evenly illuminate the background. Make sure your lights are positioned to prevent shadows and hotspots that can ruin the effect. Proper lighting with consistent intensity is crucial for a seamless look. Regularly checking your lighting setup can help identify and correct issues before shooting. Consistent lighting conditions also help maintain a professional appearance across multiple takes. Using the right cabling solutions ensures your lighting equipment stays securely powered and well-organized during shoots. With careful lighting, you’ll achieve a seamless background ready for any scene. Additionally, maintaining your equipment and understanding gear care tips can help ensure consistent results during your shoots.
Proper Light Placement
Proper light placement is essential for a seamless green screen background because even slight inconsistencies can cast shadows or cause uneven color, making post-production difficult. To achieve this, position your lights evenly around the subject and guarantee they are directed at the green screen to minimize shadows. Use multiple light sources to evenly illuminate the backdrop, preventing hot spots and dark areas. Keep lights at a consistent distance and angle to maintain uniform color across the background. Shadow control is critical; avoid placing lights too close or at sharp angles that could cast shadows on the green screen. By carefully adjusting your light placement, you reduce uneven lighting and shadows, creating a clean, professional background that’s easier to key out during editing. Additionally, understanding color accuracy and how it affects the overall lighting can help you fine-tune your setup for the best results. Ensuring proper light diffusion can also significantly improve the evenness of your lighting, further enhancing your green screen quality. Maintaining lighting consistency across your setup is crucial for achieving a seamless background. Incorporating proper light positioning techniques helps prevent common issues like hotspots and shadows, resulting in a more professional-looking chroma key. Paying attention to microplastics in dust and other particles can also help maintain a cleaner, more consistent background for better chroma key results.
Avoid Shadows and Hotspots
Achieving a seamless green screen background requires careful attention to lighting to prevent shadows and hotspots that can complicate post-production. Shadow casting occurs when your lights aren’t evenly distributed, creating unwanted dark areas. Hotspot mitigation involves ensuring your lighting is diffuse and evenly spread to avoid bright spots that can make the background uneven. Use softboxes or diffusers to spread light uniformly across the green screen and your subject. Position lights at 45-degree angles to reduce shadows and ensure consistent illumination. Proper light placement is essential for achieving a professional look and making post-editing easier. Additionally, understanding the importance of lighting diffusion can greatly improve the overall quality of your green screen setup. Ensuring your green screen fabric is smooth and taut can also help prevent uneven lighting and shadows, resulting in a cleaner background. When setting up your lights, consider the color temperature to match your camera settings and avoid color inconsistencies. Proper lighting techniques can make a significant difference in the final result. Here’s a quick comparison:
| Aspect | Tip |
|---|---|
| Shadow Casting | Use diffused, even lighting |
| Hotspot Mitigation | Spread light evenly across the surface |
| Light Placement | Position lights at 45° angles |

EMART Green Screen Backdrop Kit with Reverse Folding Base, 5×6.5ft Photo Greenscreen Background with Portable T-Shape Stand and 6 Clamps for Photography, Photoshoot, Studio Video Recording, Streaming
Reverse Folding Stand: Highly portable, comes with a carry bag for easy transport. Larger unfolding area, better stability…
As an affiliate, we earn on qualifying purchases.
As an affiliate, we earn on qualifying purchases.
Common Green Screen Mistakes and How to Avoid Them

One common mistake is poor lighting, which can create shadows or uneven color that disrupts the green screen effect. Make sure your lighting is even and properly positioned to avoid these issues. Additionally, paying attention to accurate color matching and ensuring a clear, well-setup screen will help you achieve professional results. To further enhance your green screen setup, consider understanding the digital distractions that can interfere with your focus and the quality of your production. Properly managing lighting techniques is also essential for achieving a seamless background replacement. Using professional lighting equipment can significantly improve your results and reduce unwanted shadows or color inconsistencies. Being aware of color spill and how it affects your footage can also help you troubleshoot common problems more effectively.
Proper Lighting Techniques
Lighting is essential when working with green screens because uneven or poor illumination can create shadows, hotspots, and color spill that complicate the keying process. To avoid this, verify your lights have a consistent color temperature, ideally around 5600K, for a neutral, even look. Use light diffusion to soften the light and prevent harsh shadows or bright spots. Diffused lighting helps create a smooth, uniform background, making it easier to remove in post-production. Position your lights evenly on both sides of the green screen to minimize shadows and prevent color spill onto your subject. Properly diffused, balanced lighting with correct color temperature results in a cleaner key and a more professional final look.
Accurate Color Matching
Incorrect color matching is a common mistake that can ruin your green screen shot. When your colors aren’t properly calibrated, your footage may have mismatched tones, making it difficult to achieve clean chroma keying. To fix this, verify your monitor is calibrated correctly using color calibration tools, so what you see is true to real life. Accurate monitor calibration helps you judge the green screen’s hue and brightness precisely, avoiding shadows or color spill. Additionally, check your camera’s white balance and exposure settings before filming. By maintaining consistent, true-to-life colors throughout your setup, you’ll improve the accuracy of your keying process and produce a smooth, professional-looking background replacement. Proper color calibration and monitor calibration are essential for flawless green screen results.
Clear Screen Setup
A common mistake in green screen setup is failing to guarantee the screen is smooth, wrinkle-free, and evenly lit. Uneven lighting causes shadows and hotspots, which complicate chromakey techniques and make it harder to key out the background cleanly. To avoid this, stretch and tighten the fabric to eliminate wrinkles and use soft, diffuse lighting to ensure consistent illumination across the entire screen. When selecting your background, choose a color that contrasts well with your subject and avoids busy patterns or similar hues. Proper background selection simplifies chromakey techniques and reduces post-production editing time. Remember, a well-prepared, evenly lit, and wrinkle-free green screen allows for smoother keying and a more professional final look. Proper setup is the foundation for seamless green screen results.

10X12ft Green Screen Backdrop for Photography, LCUIRC Chromakey Polyester Collapsible Greenscreen Background for Streaming, Photography, Zoom Meeting, Video Editing, Podcasting
【10×12 FT LARGE SIZE 】10X12ft green backdrop, completely seamless and large enouge to provides a uniform background if…
As an affiliate, we earn on qualifying purchases.
As an affiliate, we earn on qualifying purchases.
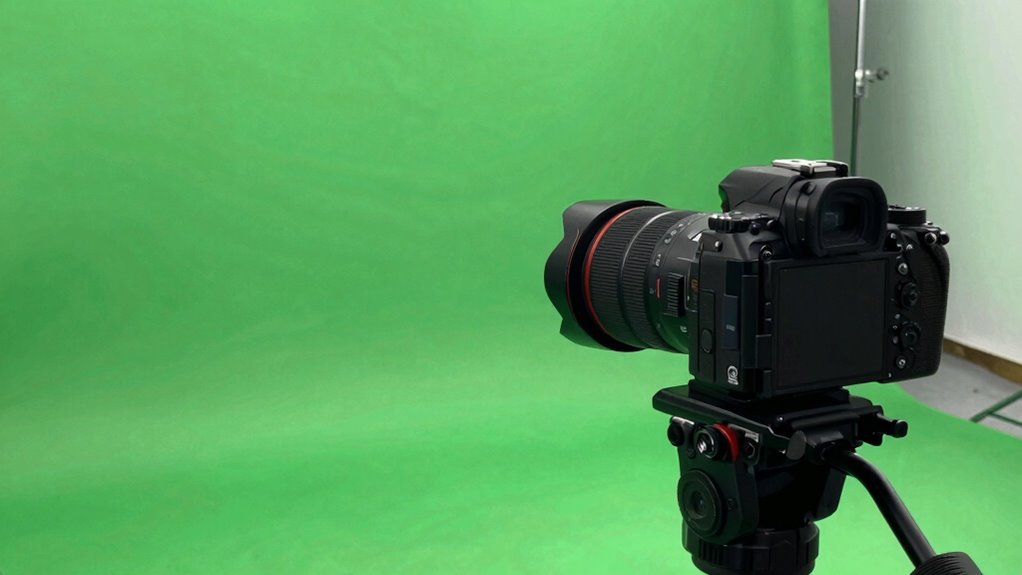
Camera Settings and Framing Tricks for Better Compositing

To achieve seamless green screen compositing, you need to pay close attention to your camera settings and framing. Start by adjusting your focal length; a longer focal length reduces distortion and helps keep lines straight, which is essential for clean edges. Make certain your framing composition places the subject well within the shot, avoiding tight crops that can cause unwanted shadows or cut-offs. Keep the camera steady to prevent motion blur and maintain consistent framing. Use manual focus to avoid shifts during recording, and set your aperture to achieve even exposure across the scene. Proper framing not only improves visual appeal but also minimizes post-production adjustments. By fine-tuning these settings and paying attention to composition, you’ll create a more professional, easier-to-edit green screen shot.
Post-Production Fixes to Improve Your Green Screen Backgrounds

Even after capturing a well-framed green screen shot, issues like uneven backgrounds, color spill, or shadows often need correction in post-production. Post production color correction helps balance the overall shot, reducing unwanted color cast and making keying easier. You can adjust hue, saturation, and luminance to create a more uniform green background, which simplifies background replacement techniques. When fixing background issues, focus on isolating the subject clearly and refining edges to prevent halo effects. Using tools like color keyers or matte choker can improve transparency and blend the subject seamlessly into a new background. These adjustments help guarantee your final composite looks natural and professional, even if your original footage had imperfections. Proper post-production fixes are vital to elevating your green screen results.
Workflow Tips for Consistent, High-Quality Green Screen Results
Achieving consistent, high-quality green screen results requires establishing a streamlined workflow that minimizes errors and saves time. Start by carefully planning your camera angles to ensure even lighting and minimal shadows, which simplifies keying and color correction later. Use consistent camera settings for every shot to maintain uniformity. During filming, monitor your footage for proper exposure and avoid quick movements that can cause motion blur. In post-production, focus on precise color correction to match the background seamlessly. Organize your files systematically so you can easily access and adjust them as needed. Incorporate regular checks of your green screen’s color consistency throughout the process. A disciplined workflow helps prevent issues and guarantees your final composite looks natural and professional.
Frequently Asked Questions
Can Green Screen Work Outdoors Without Special Lighting?
Green screens can work outdoors without special lighting, but you’ll face lighting challenges and weather considerations. Bright sunlight causes harsh shadows and uneven lighting, making keying difficult. Overcast days provide softer, more even light, which is better. To improve results, use diffusers, reflectors, or shade to control natural light. Keep an eye on weather conditions, as rain or wind can ruin your shoot and affect the green screen’s effectiveness.
What Are the Best Green Screen Materials for Portability?
Did you know 65% of content creators prefer portable solutions? For portability, collapsible backgrounds are your best bet. They’re lightweight, easy to set up, and come with durable, portable fabric options. Look for high-quality, wrinkle-resistant fabric that folds into a compact size. Collapsible backgrounds offer convenience without sacrificing quality, so you can film anywhere. With these, you’ll get professional results even on the go.
How Does Clothing Color Affect Green Screen Compositing?
Your clothing color greatly impacts green screen compositing because low contrast between your outfit and the background causes issues like color spill and blending. To get a clean composite, wear clothing that contrasts well with the green screen, avoiding shades similar to the backdrop. This helps prevent color spill, where green reflects onto your clothing, making it harder to key out the background accurately. Choose bold, distinct colors for the best results.
Is Software Quality More Important Than Hardware for Green Screen Editing?
You might think hardware is more critical, but software quality really matters for green screen editing. If you focus on software optimization and ensuring your tools are compatible with your hardware, you’ll get smoother performance and better results. Good hardware helps, but without well-designed software that leverages it, you’ll struggle with glitches and poor compositing. Prioritize quality software to make your editing process more efficient and your backgrounds look professional.
How Do Shadows Impact the Green Screen Keying Process?
Shadows considerably impact the green screen keying process by disrupting lighting consistency and making it harder to eliminate shadows effectively. When shadows appear on the green background, they create uneven tones, complicating the keying process. To improve results, you need to guarantee consistent lighting and focus on shadow elimination, which helps your software produce a cleaner, more seamless background removal. Proper lighting setup is essential for professional-looking green screen footage.
Conclusion
Now that you know the secrets behind perfect green screens, your backgrounds won’t just look good—they’ll look like they’re from another dimension! Say goodbye to embarrassing spills, shadows, and fuzzy edges forever. With these tips, you’ll create backgrounds so flawless, viewers will think you’re a Hollywood pro. Get ready to blow minds and make your projects look 10 times more professional instantly. The green screen world is yours—go conquer it!